


Welcome to my "Max Photo Makeover" series, where I walk though the steps taken to arrive at my final photographic outcome.
Location Information:
Location Information:
Taken at the Kiev Retro and Exotica Car Show, Kiev, October 13, 2012
Original Photo Information:
ISO 400, 28mm, f/9.0, 1/80 sec
Processing Tools:
Photomatix (HDRSoft)
Adobe Lightroom
Adobe Photoshop
Topaz Detail
Processing information:
HDR created from one original photo (-2, 0, +2)
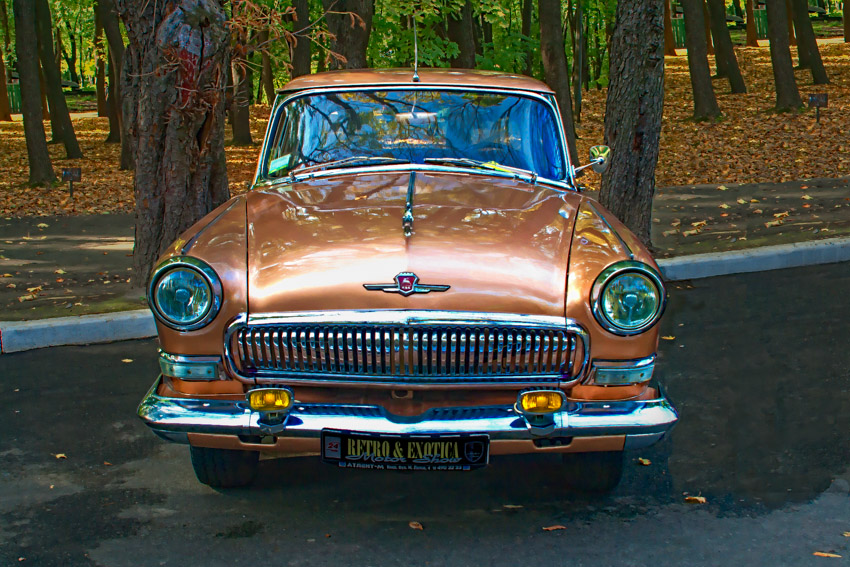
Removed a car from the right side of the photo.
Filled in the missing space by using elements from the left side of the picture..
The Before Photo:
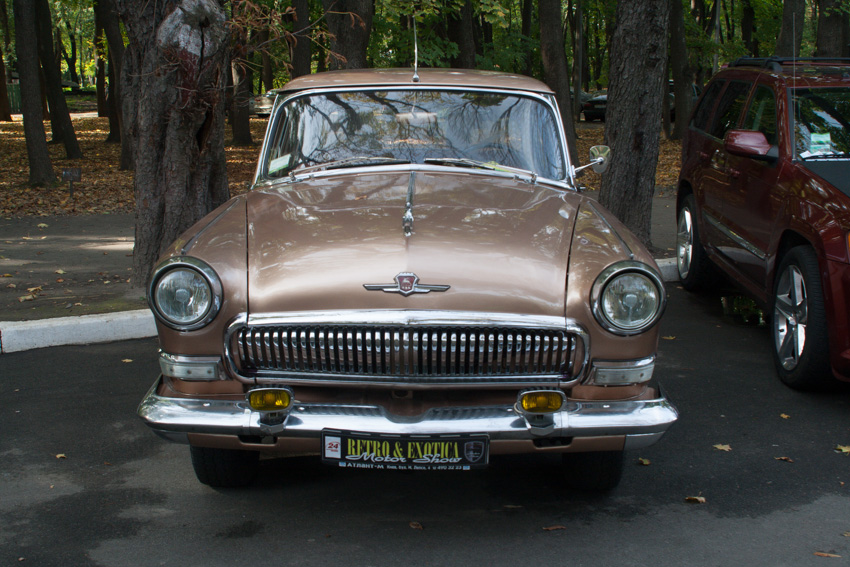
The Before Photo:
The After Photo:
The Details:
While the real stars of this show were inside the exhibition center, there were a number of lesser stars on display in the lot outside. This classic Gaz automobile was one of them. So, what did I do here?
Using Lightroom, I created two virtual copies of the original photo. I left the original photo at it’s original exposure and set the two others to -2EV and +2EV. I exported the three photos out of Lightroom and imported them in to Photomatix. For more on this part of the process, see my “Break the Rules” HDR tutorial. Once I was finished in Photomatix, I imported the HDR photo and the three photos exported earlier back into Lightroom. Now it’s time for some Photoshop magic.
First, I select all four photos in Lightroom, did a right click, and selected “Edit In” > “Open as Layers in Photoshop.” Once all photos were ready in Photoshop, I moved the HDR version to the top of the stack, then one by one compared it to the 0EV version, the -2EV version, and the +2EV version to see if there were any elements in the EV versions that looked better than what appeared in the HDR version. In this case, there were none, so one by one I merged each image until the photo was flattened.
Now’s the time for some cloning. Often times when cloning, you import details from another photo to construct your project in the most pleasing manner. But I saw enough in the photo to use to construct the photo in the manner I wanted. Now to get rid of the car on the right side. If you look to the left side of the photo, you see a cluster of three trees. I selected a large rectangular area that included those three trees, the asphalt sidewalk, down to the left curb and to the bottom. I copy and pasted that selection, and moved it into place on the right side. I then pasted that same set of trees a second time and moved it right next to the first copy. To make it look more random, I cloned out one of the signs on the copied areas.
Next to do some blending and cloning. I used the Content Aware tool in Photoshop to blend the edges of the copies. Now I had the trees where I wanted them and the curb approximately where I wanted it. But the asphalt sidewalk was too wide. I needed to clone some of the leaves to align the sidewalk on the right side with the sidewalk on the left side. Then I needed to use the clone stamp to line up the curb on the right just so. Now, where I had copied and pasted earlier, the resulting paste did not reach to the bottom of the photo, leaving an unrealistic looking edge. I select both of those copies and applied a layer mask to it. Then using a soft edge brush, I brushed through to bring the original border between the wet and dry asphalt to the fore.
But yet, looking closely, there was still something that bothered me. On the original photo, if you look carefully, you can see that there is a parking lot in the background. And that parking lot was a lot more obvious in the HDR version than it was in the original. What to do? I bought out the clone stamp again and turned that parking lot and it’s vehicles into a patchwork of green leaves, brown leaves, and tree trunks.
As a final step, I duplicated the layer with all the changes and bought it into Topaz Detail and applied the Bold Detail preset. Back in Photoshop, I selected Edit > Fade Topaz Detail, then bought the sharpened layer down just a bit. There. Now I had my final result. Although in my case, rarely is anything final Final. I often go back and tweak it a bit at a later date.
Now for a direct comparison of the Before and After. Click anywhere within the photo to make the slider move to the left or the right. SUCCESS!
No comments:
Post a Comment